How to add an event
A step-by-step guide
First, a Product has to be created in order for the checkout process to work. Second, we create the Event, where we add the Product.
Have your assets done before you begin:
• Event banner image (size 2130 x 1200 pixels)
• Event title (include if the event is a ‘Conversation’ or a ‘Lecture’
• Event description, date and time, location (for the Product)
• Event zoom link (for the event page)
The assets done for the event section launch of this website are located in this DropBox folder.
1 – Creating the Product
Creating the Event | Editing the Event Settings | Editing the public Event page
First, let’s duplicate a similar product
1 – Open Event Registration in a new browser tab.

2 – Click ‘All’ to see all products.

3 – Click the 3-dot menu on a product you want to duplicate.

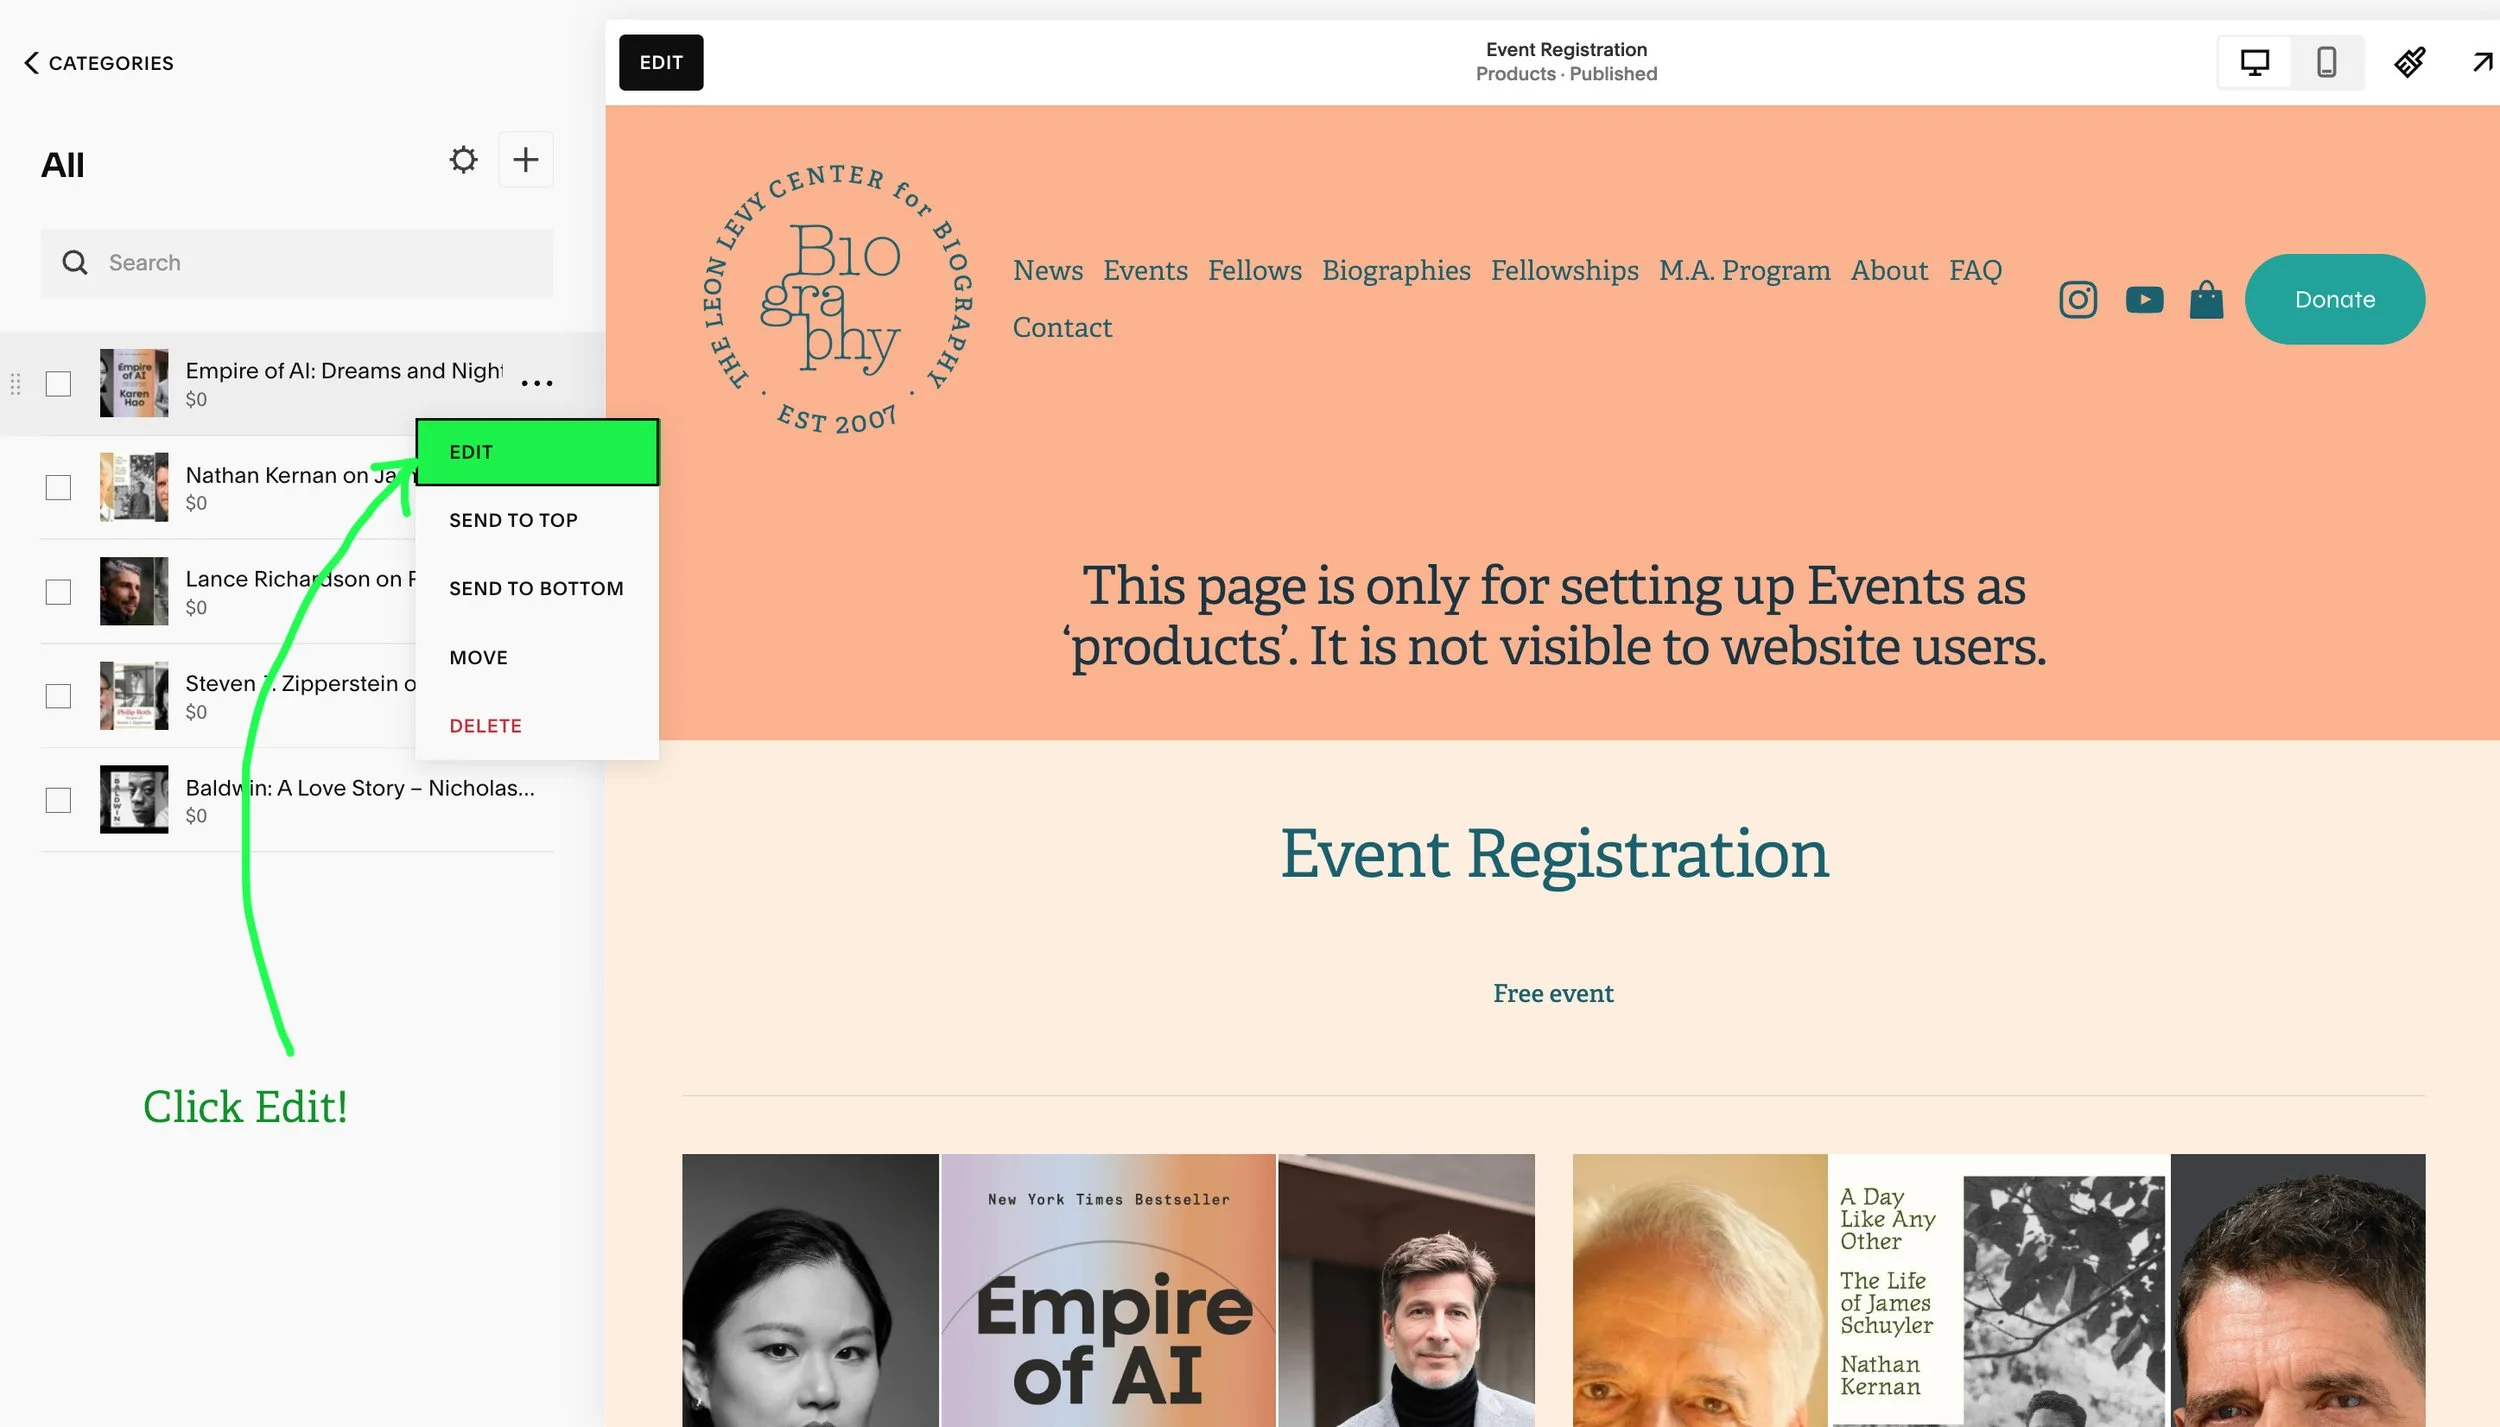
4 – Click ‘Edit’.
5 – Duplicate the product.

You have now duplicated a product, and are immediately in its Settings page. Here is a small overview of the product settings page. The product settings is a pretty long page, so it has its own menu at the top left hand side.

Note the green areas. We are only going to change information in these sections:
• Details (the event title and description; keep the Free Event text.)
• Images (the banner for the event)
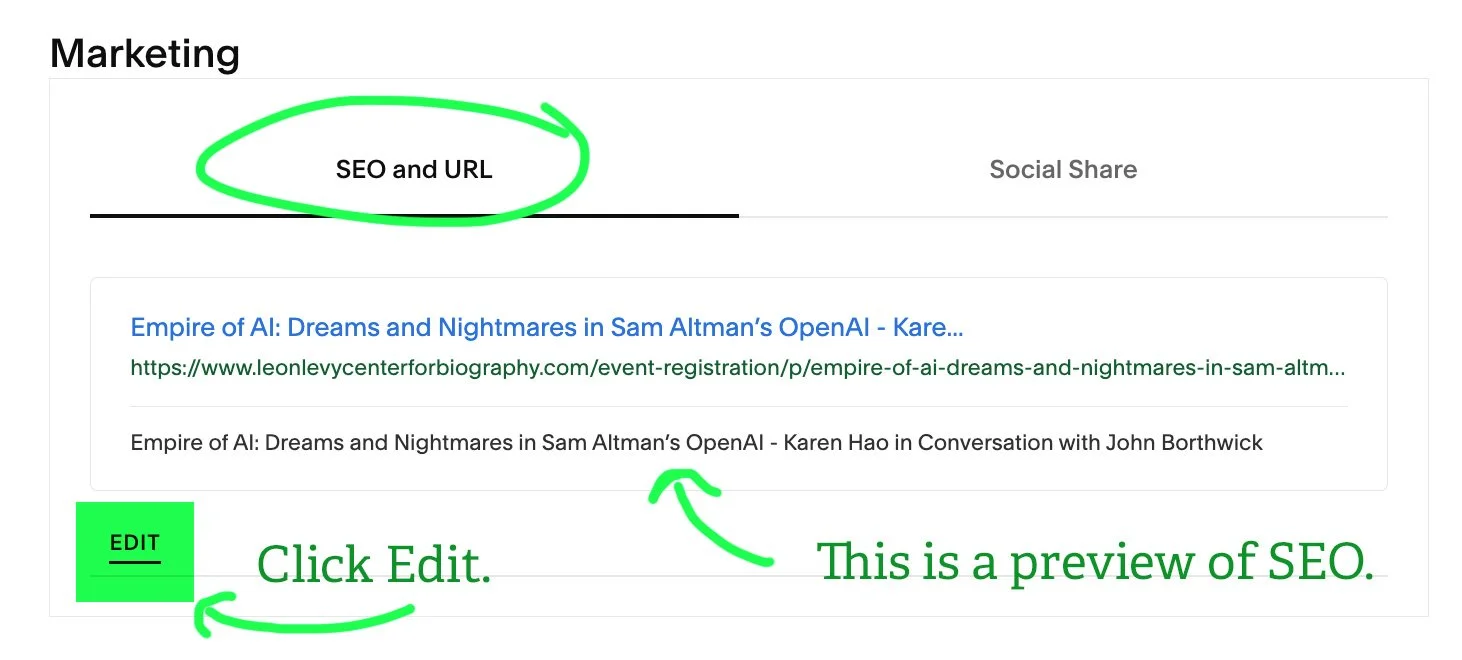
• Marketing (the url and seo for the event)

6 – Replace the product title, and add the description below the free event text.
7 – Replace the product image.

8 – Replace url and SEO with the event title.

2 – Creating the Event
Creating the ‘Product’ | Editing the Event Settings | Editing the public Event page
Now, let’s duplicate a similar event.
1 – Open the Event page.
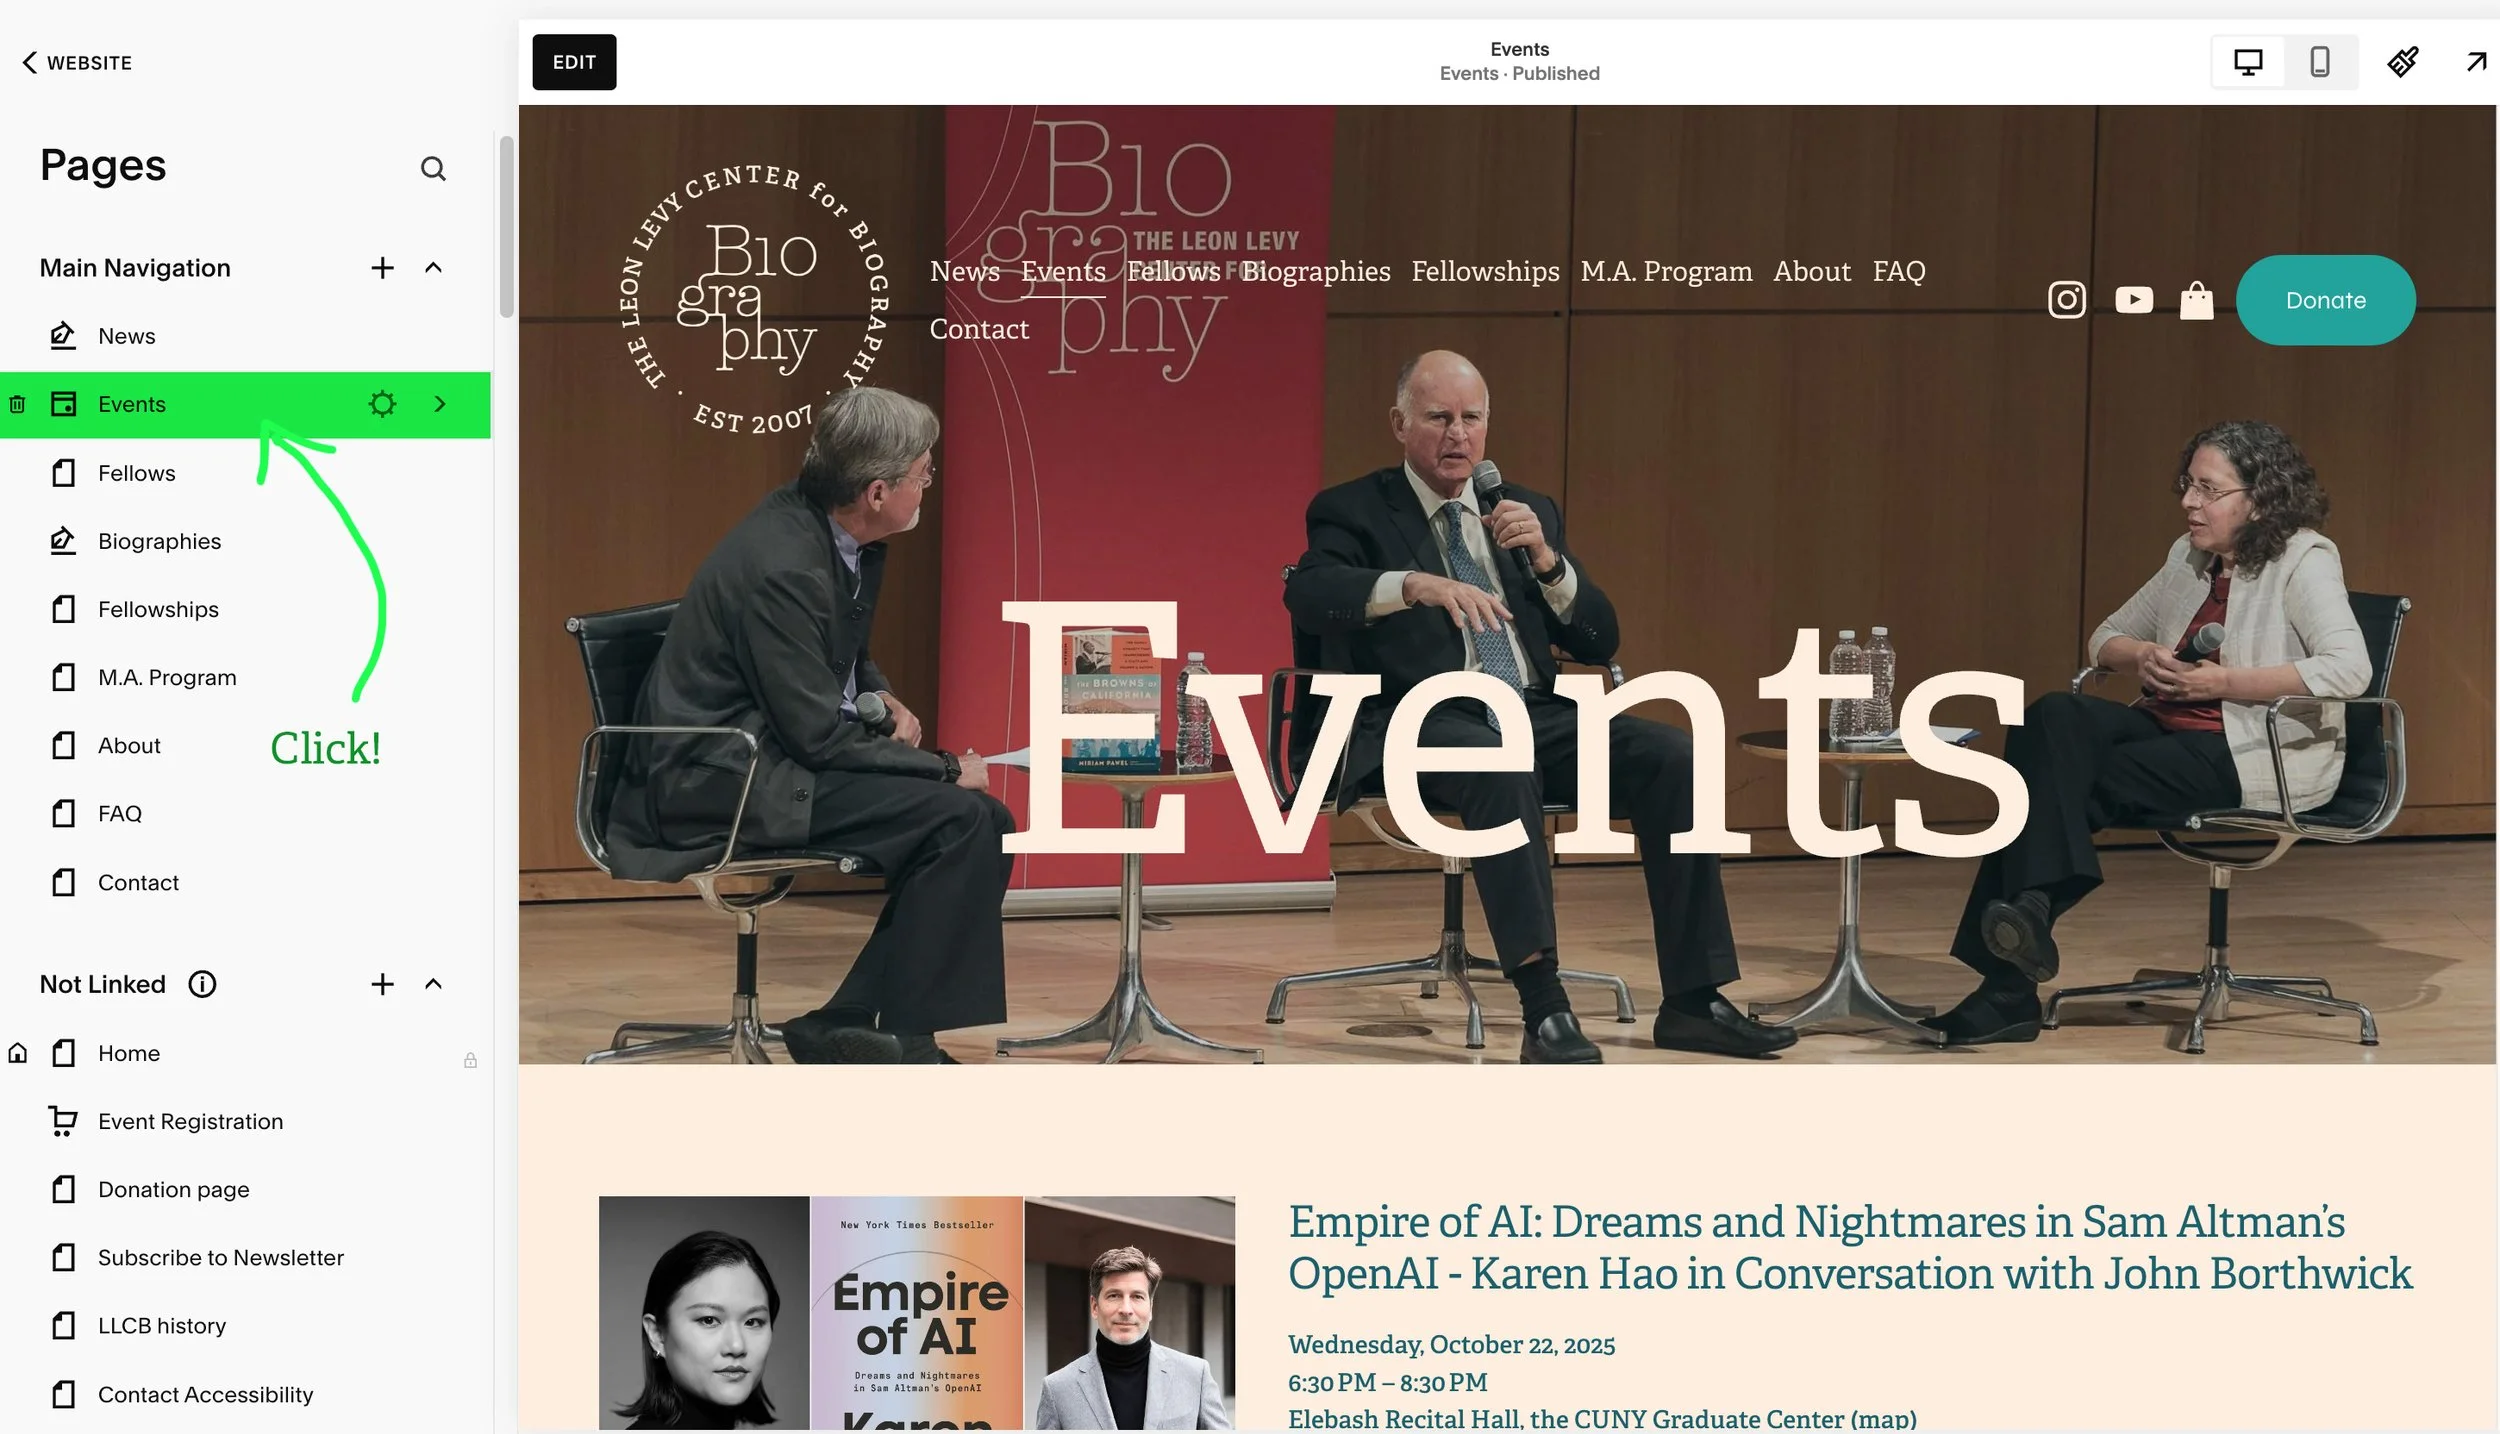
2 – Click the 3-dot menu, then click ‘Duplicate’.

You now have a duplicate draft event in the left-hand menu.
3 – Editing the Event ‘Settings’
Creating the ‘Product’ | Creating the Event | Editing the public Event page

2 – Modify information in the ‘Options / Tags’ section.
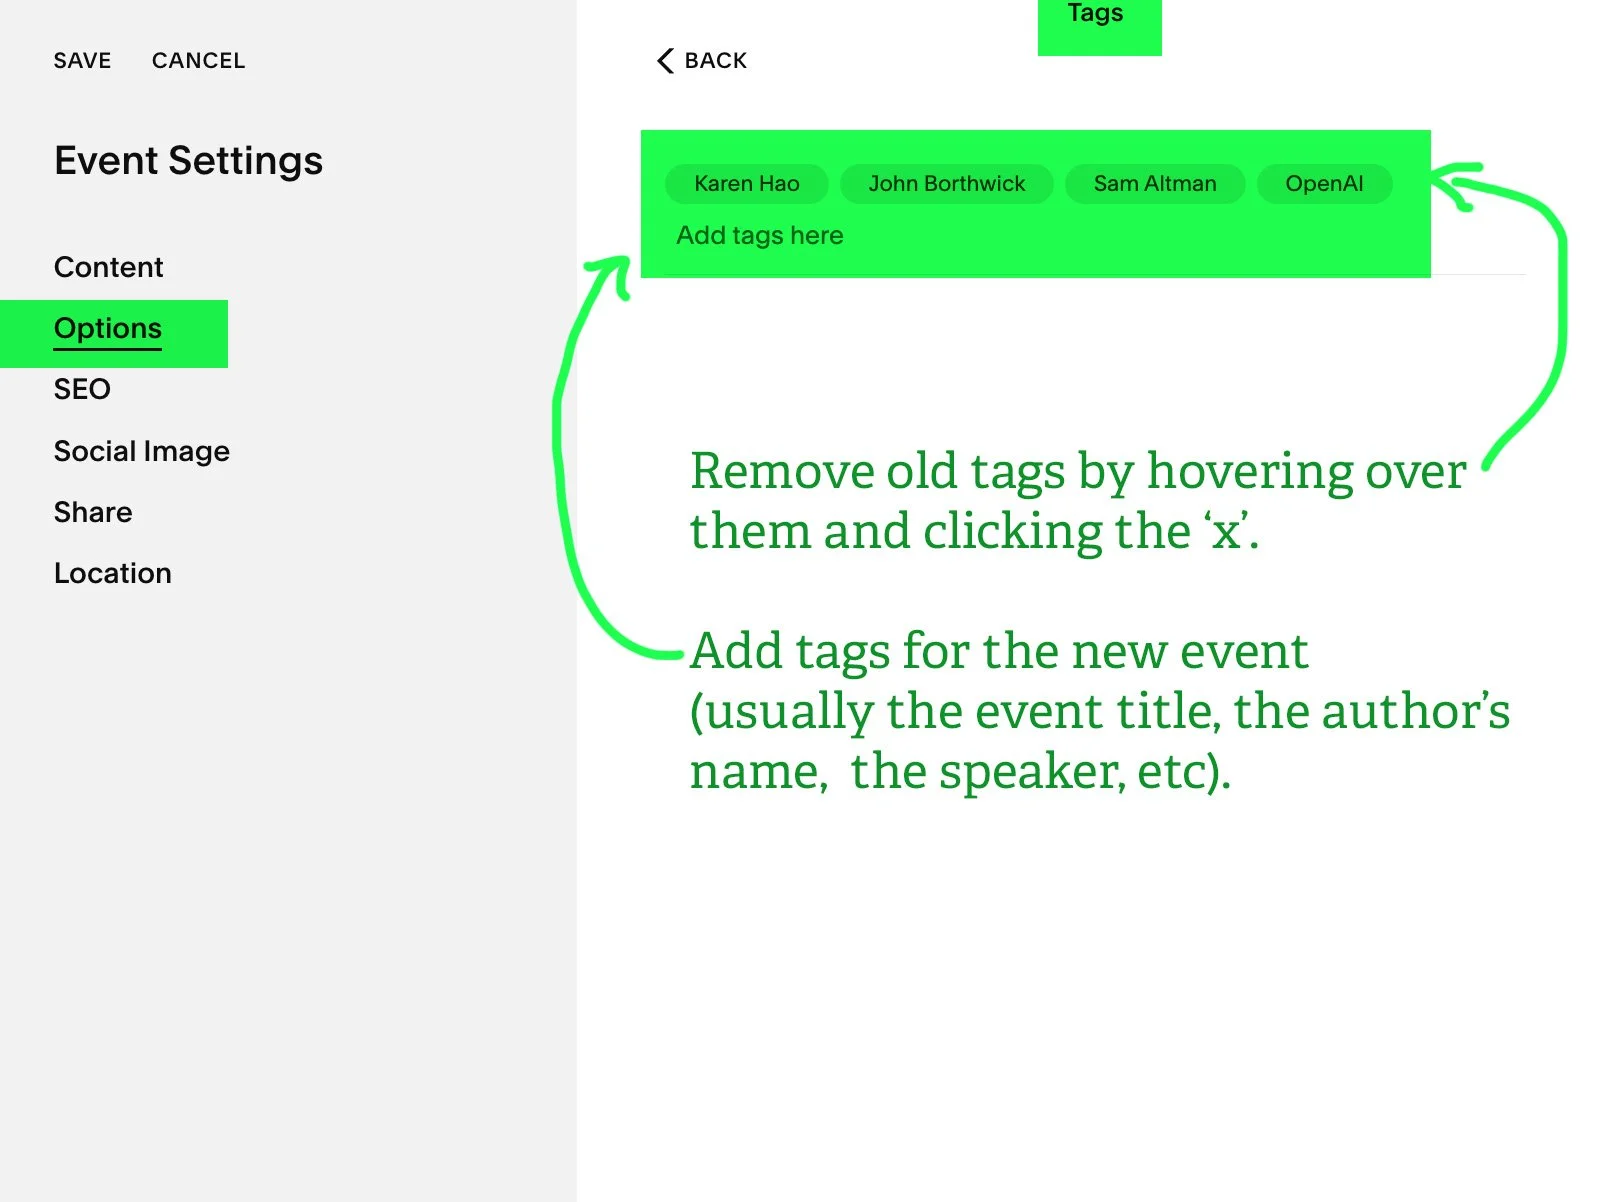
Re tags: Think of tags as useful categories. For example, the title for this event (Empire of AI: Dreams and Nightmares in Sam Altman’s OpenAI - Karen Hao in Conversation with John Borthwick) is a useful tag. This title can also be broken up into several tags. People’s names are also useful tags as is the year of the event.
3 – Modify the address in the ‘Location’ section (if necessary).
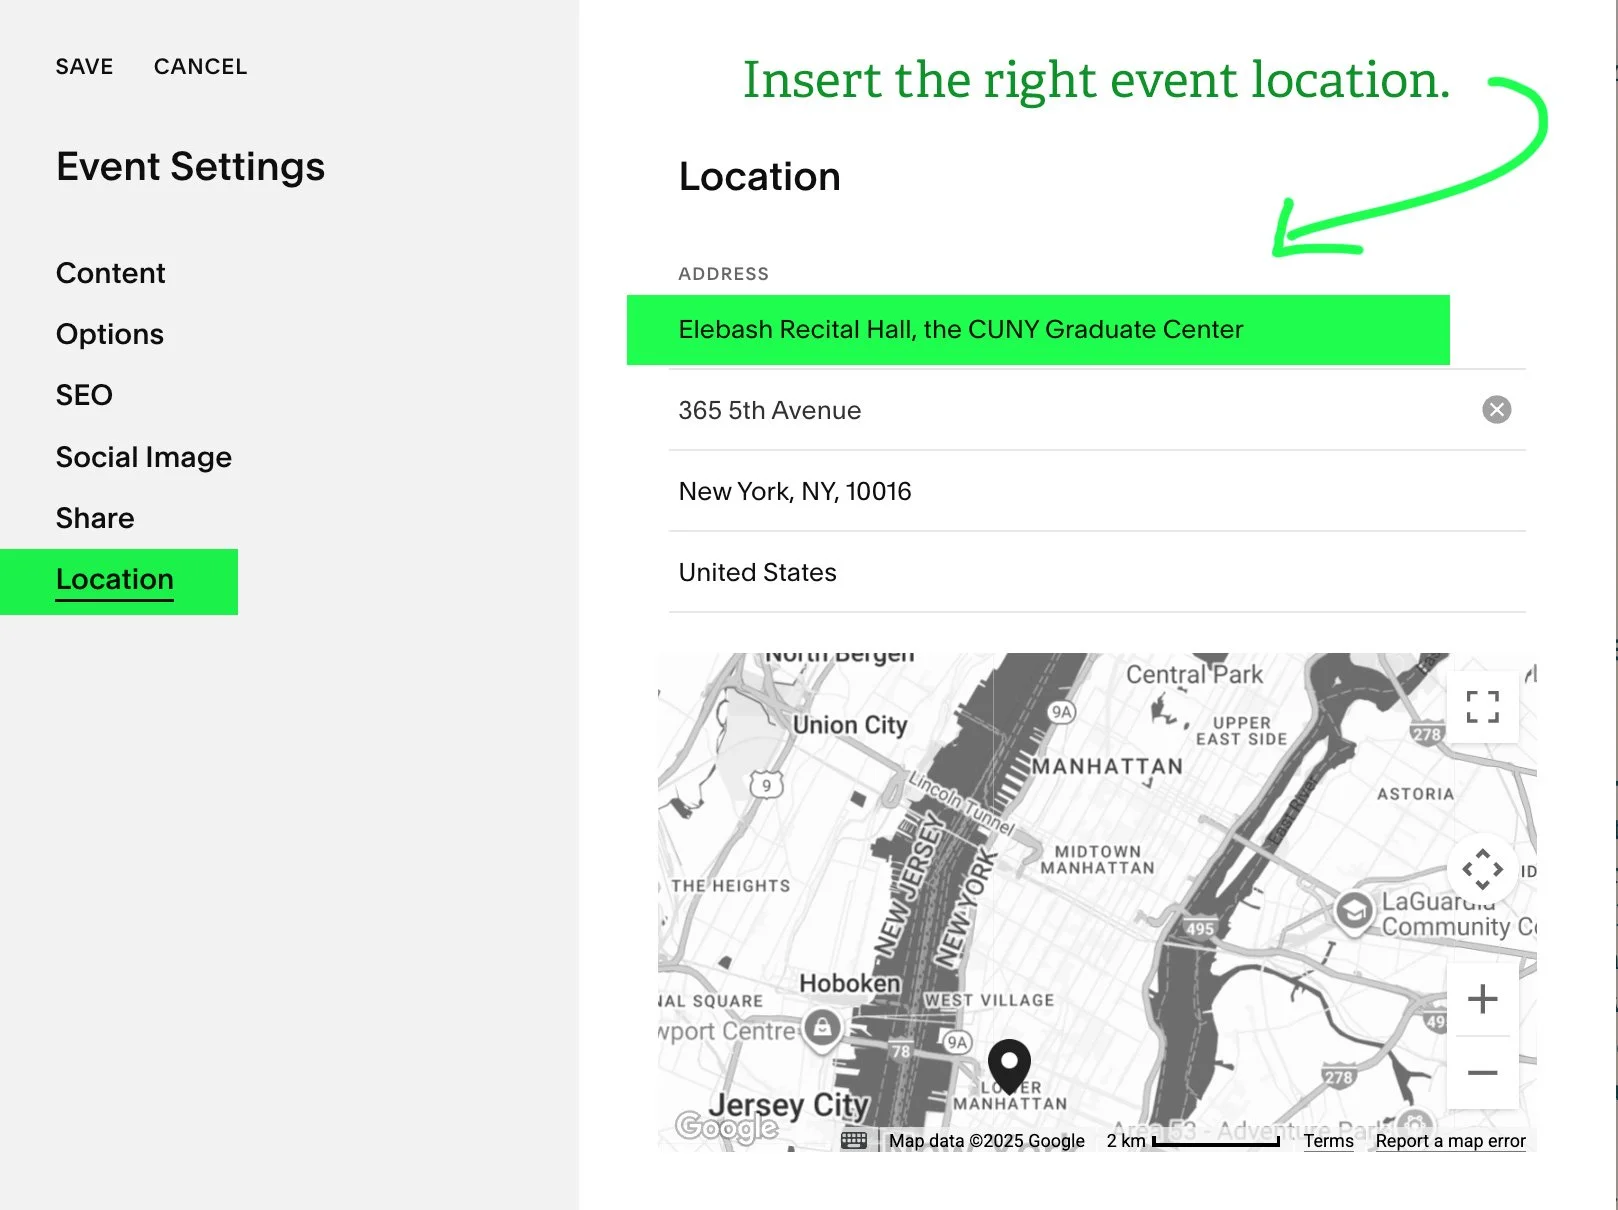
Save the settings.
You access the Settings via the 3-dot menu on the draft duplicate event you just created.

1 – Modify information in the ‘Content’ section.
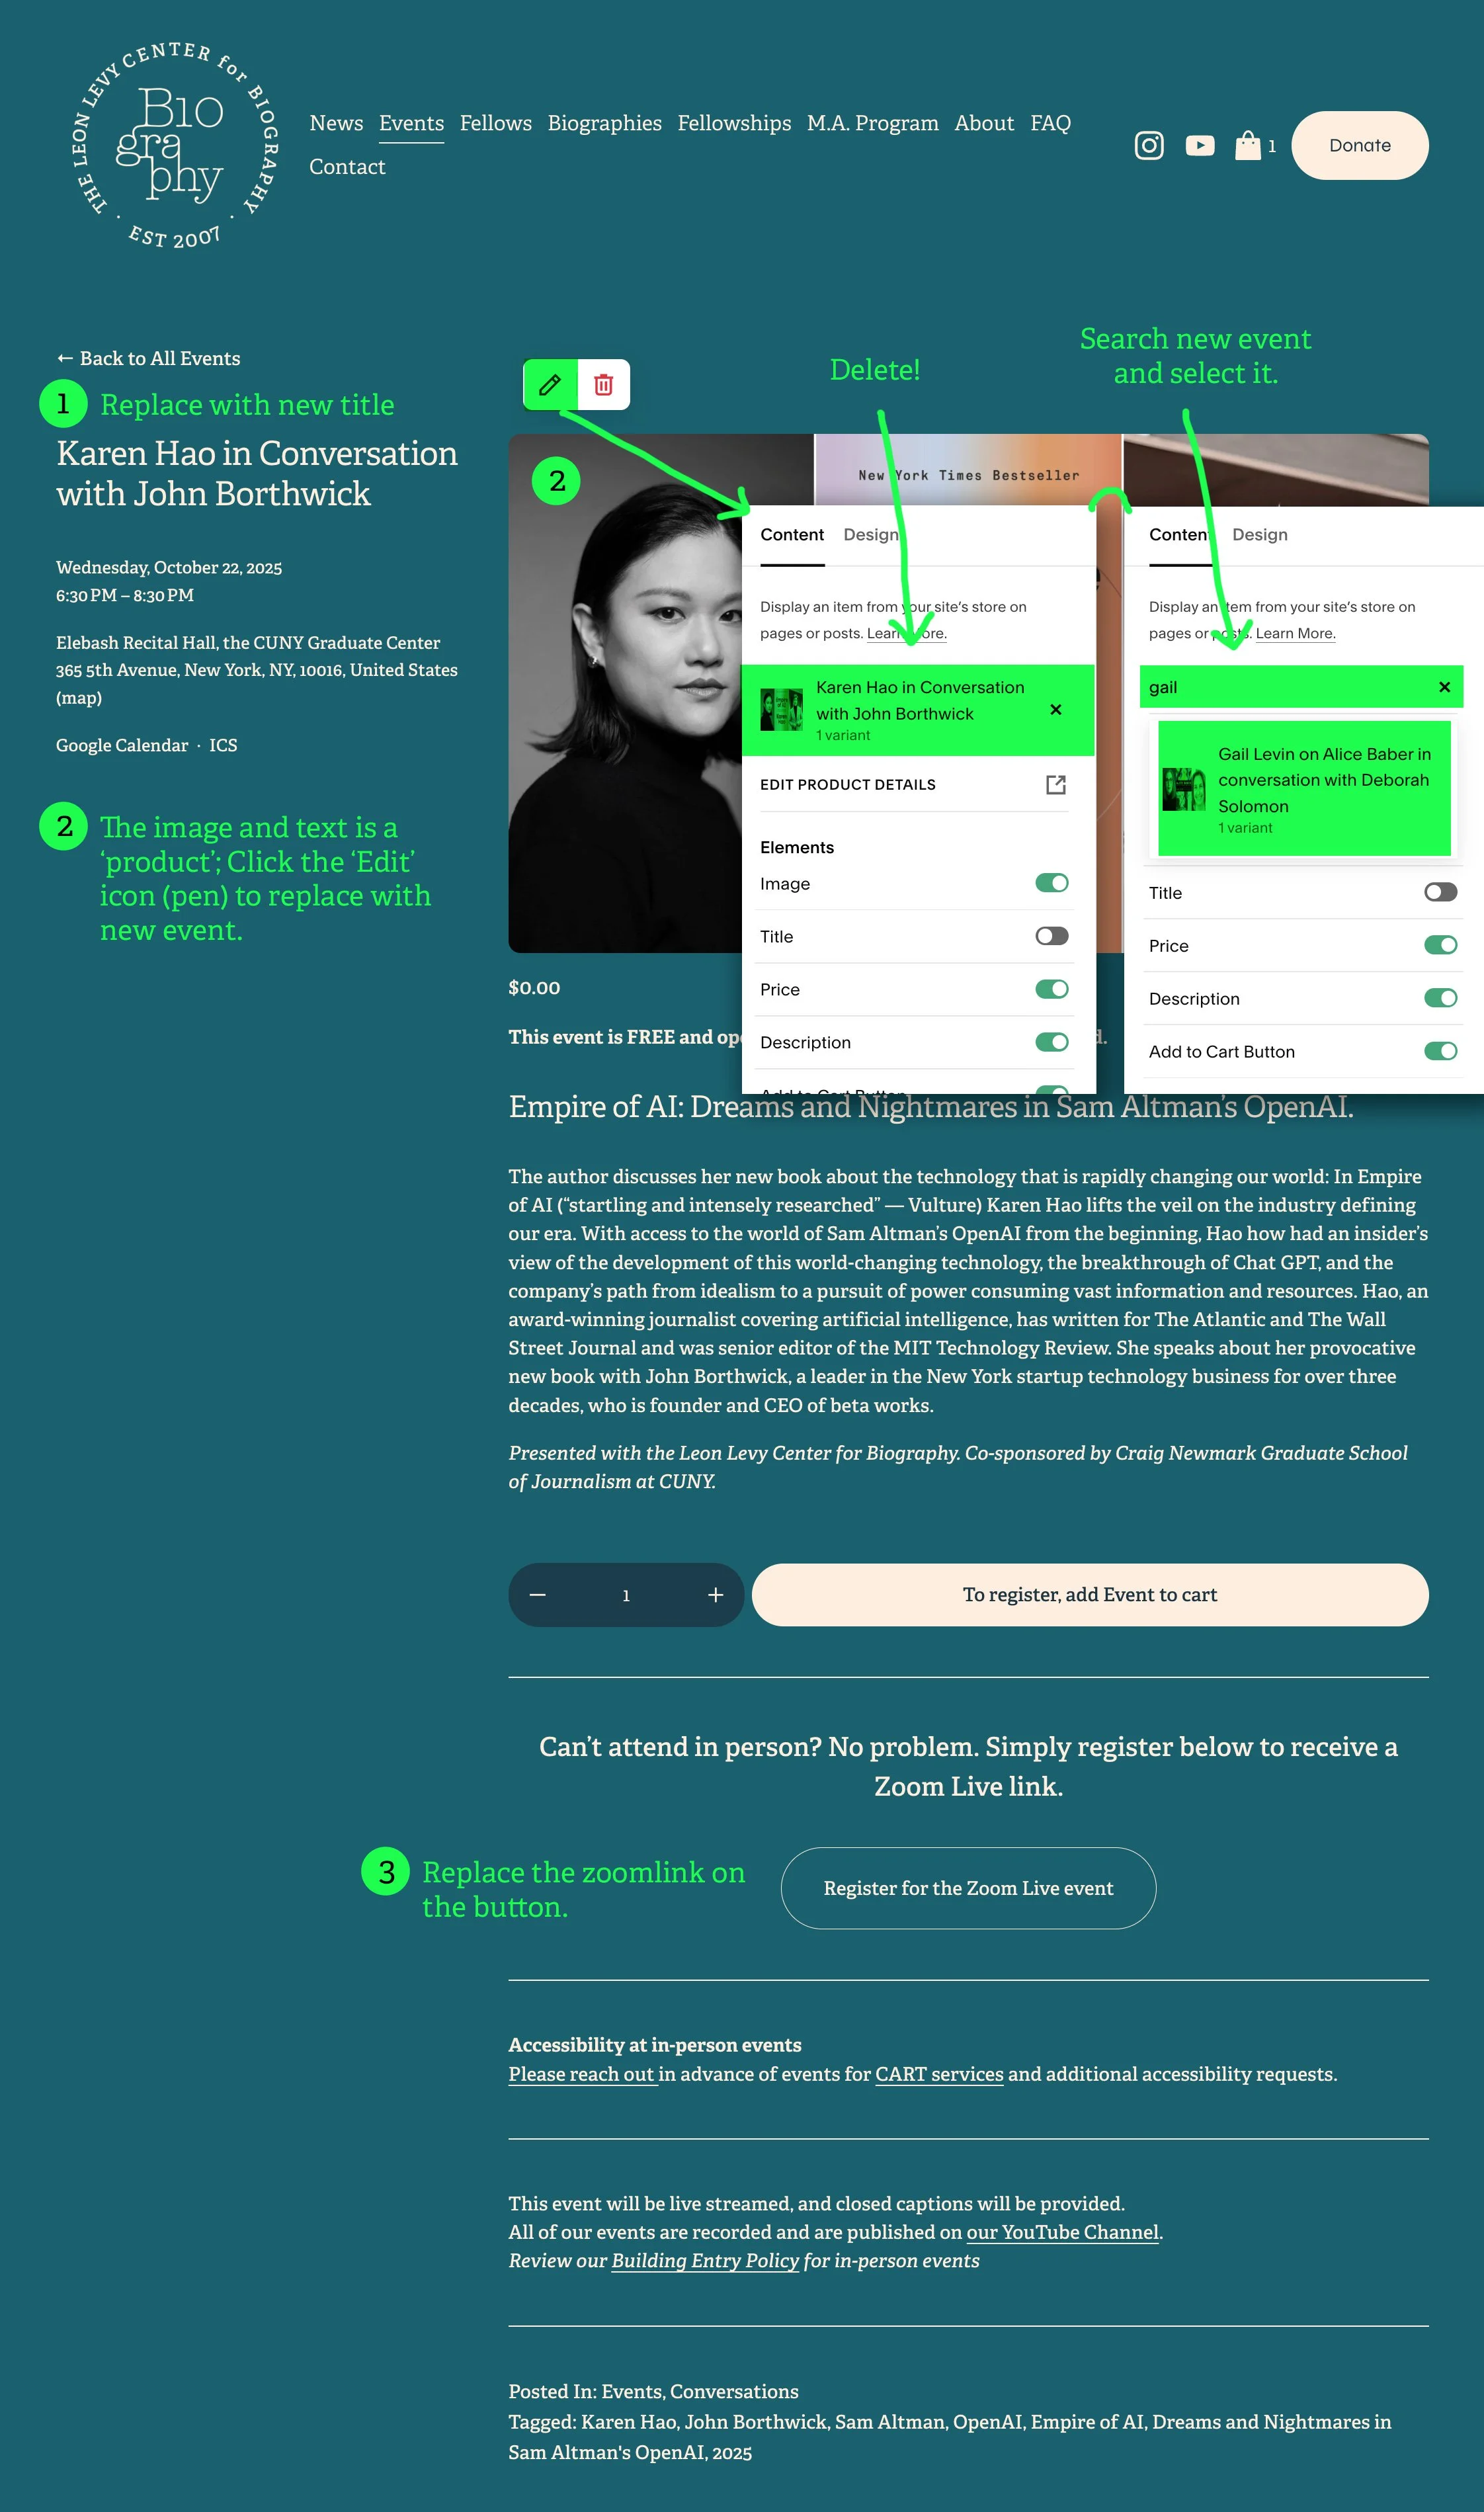
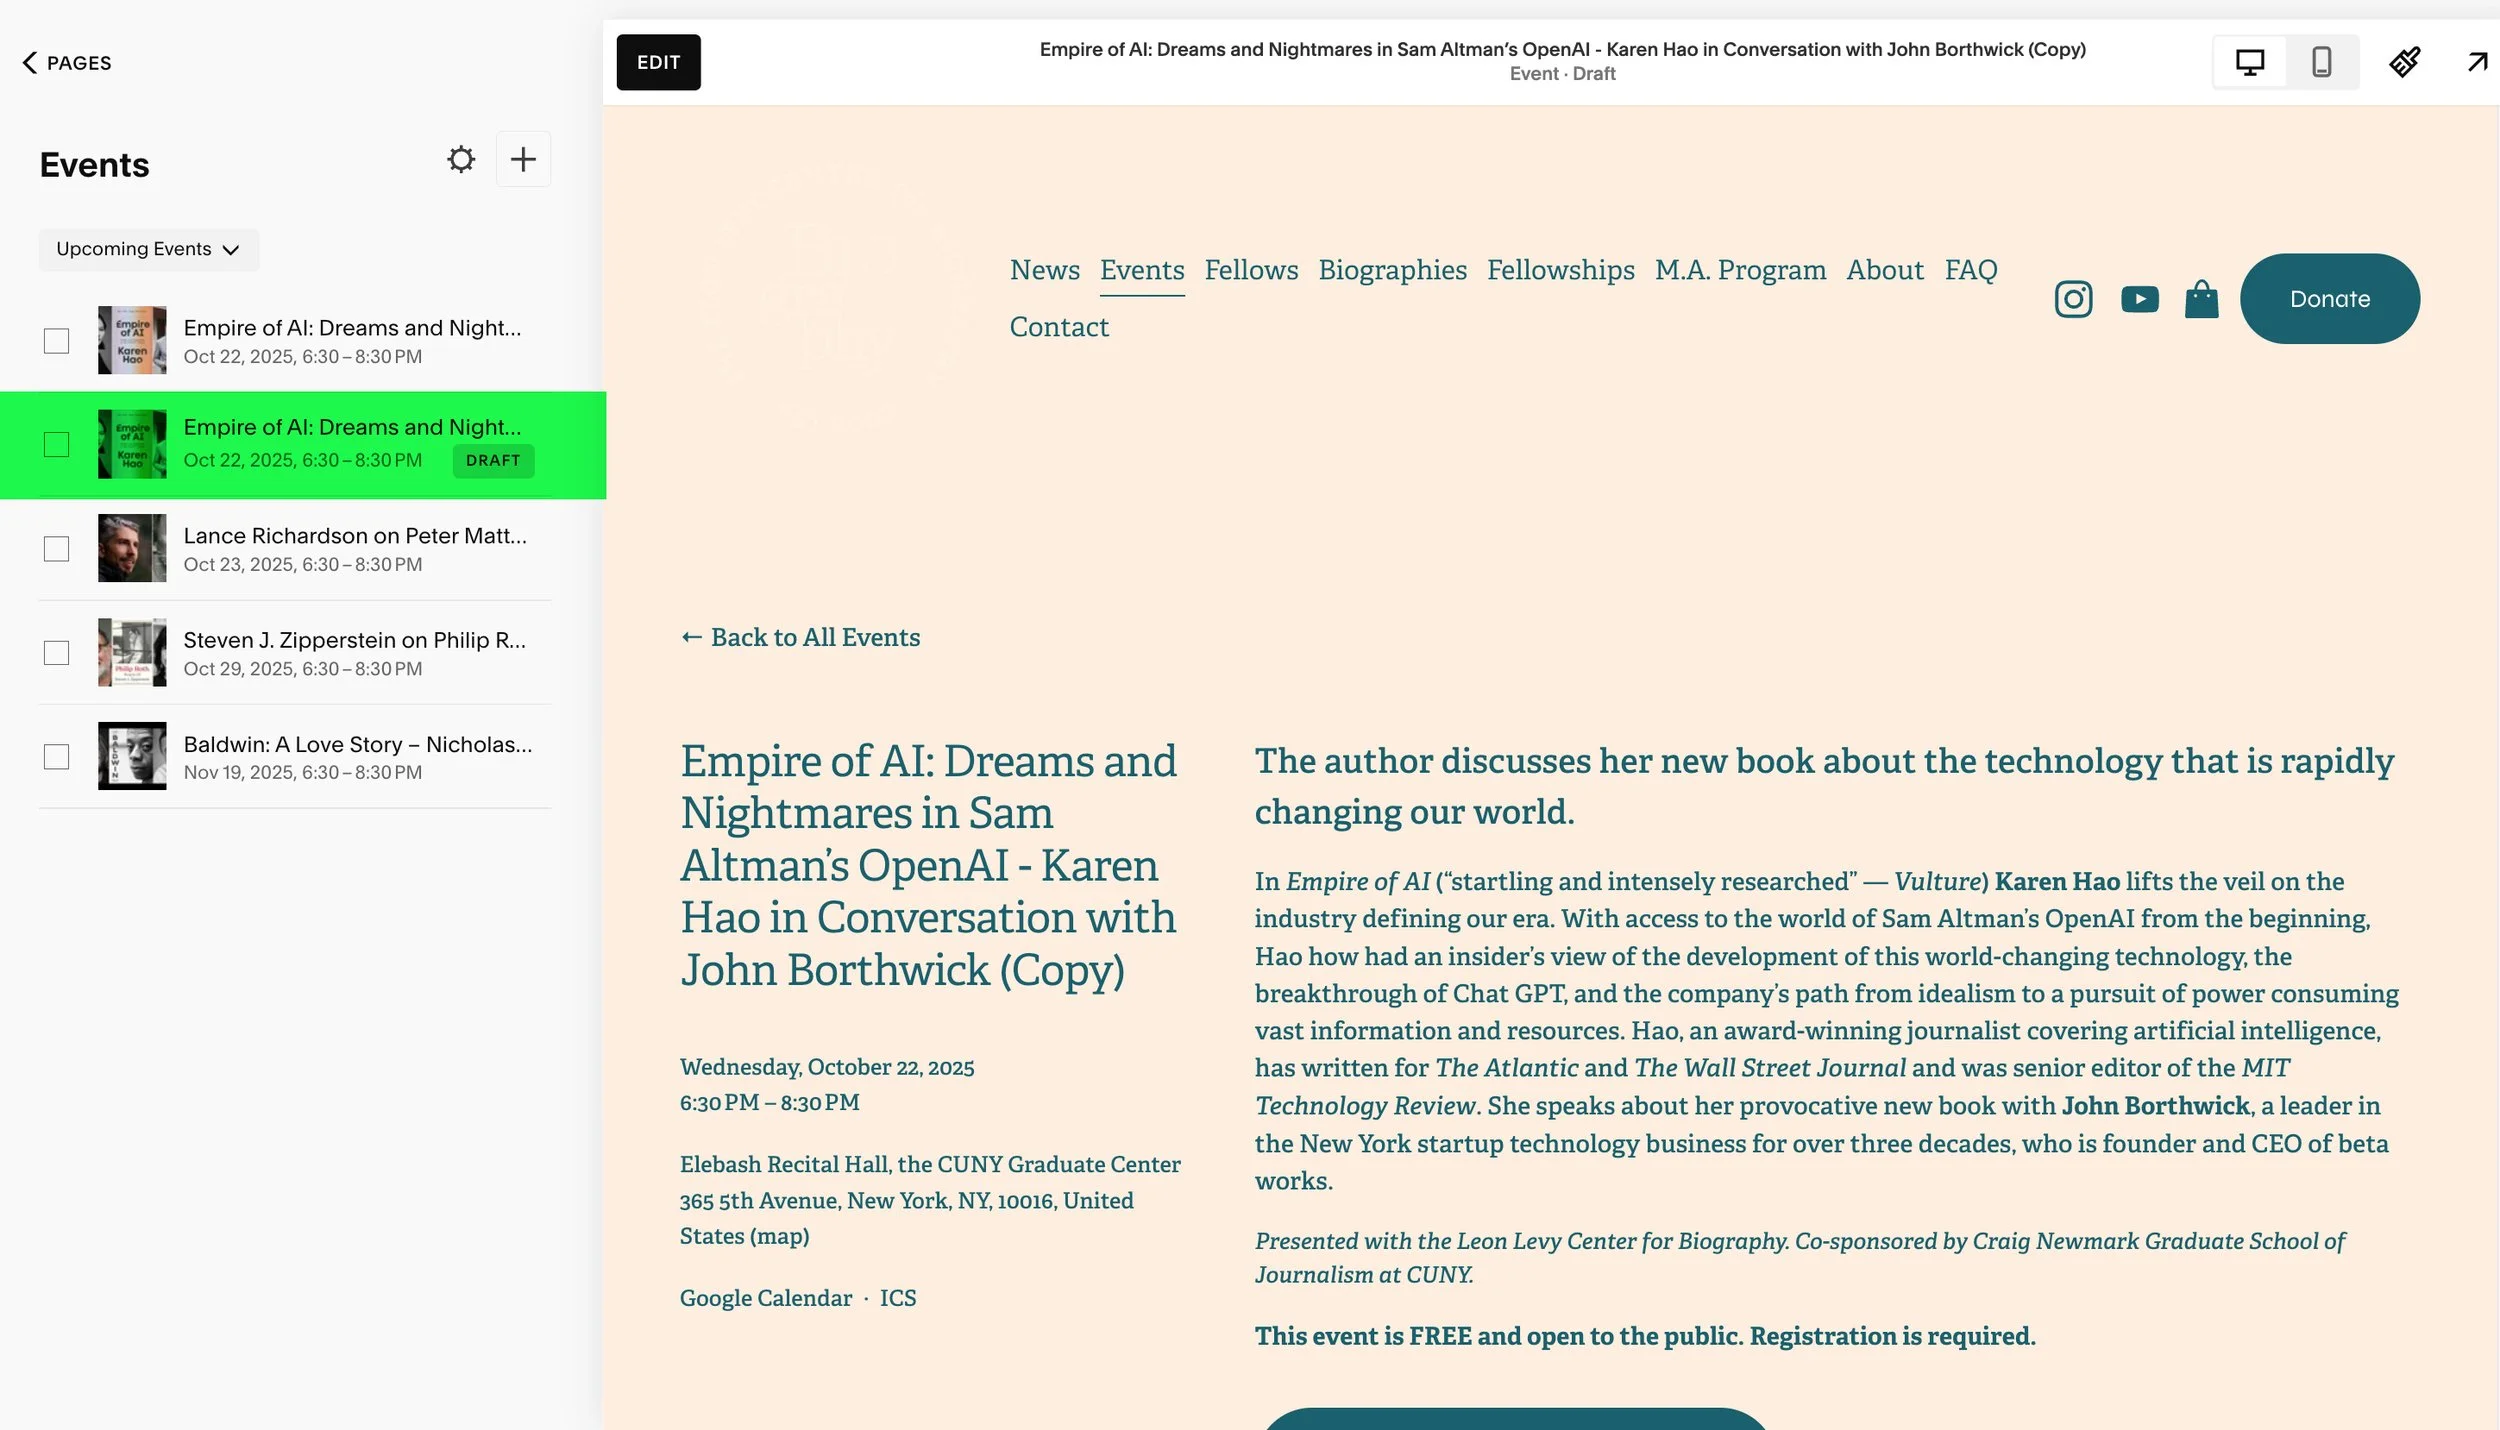
4 – Editing the public event page
Creating the ‘Product’ | Creating the Event | Editing the Event settings
You access the public event page by clicking on the draft page in the left hand menu. Then, click the black ‘Edit’ button .

1 – Replace content.
This is where we will pull in the ‘product’ we just made – see step 2. No need to add all that info again!
Note that the event title on the left hand side is selectable and can be typed over.